Quick Links
Dragon Ball: Sparking Zerooffers players the chance to create their own intense, strategic battles through the Custom Battle feature. Whether you want to pit your favorite characters against each other or experiment with different team combinations, Custom Battles allow you to control the rules and settings for a personalized experience.
In this guide, we’ll walk you through everything you need to know about setting up and mastering Custom Battles, from tweaking battle parameters to optimizing your team strategies. We’ll be working on and presenting our very own Custom Battle for you to use as an example.

How To Get Started
The first time you enter the Custom Battle Mode, you’re shown a lengthy tutorial, but it doesn’t goas in-depth as you might needwhen creating your elaborate scenarios. The gamerecommends that you start with the Simple Edit mode, but that’s too restrictive; we will go overthe Normal Edit Mode.
As Sparking Zero’s Simple Edit mode has a decent tutorial that explains its simplified mechanics, we won’t be covering this here.

EnterCustom BattleMode,select Create New and choose Normal Edit.You’re always givena premade battle between Goku and Friezain Namek, but we’ll soon change all that as we go through every option and set the battle to do what we want.
You likely have an idea already of what you want to do. For this example,we’ll create a scenario where:

Characters
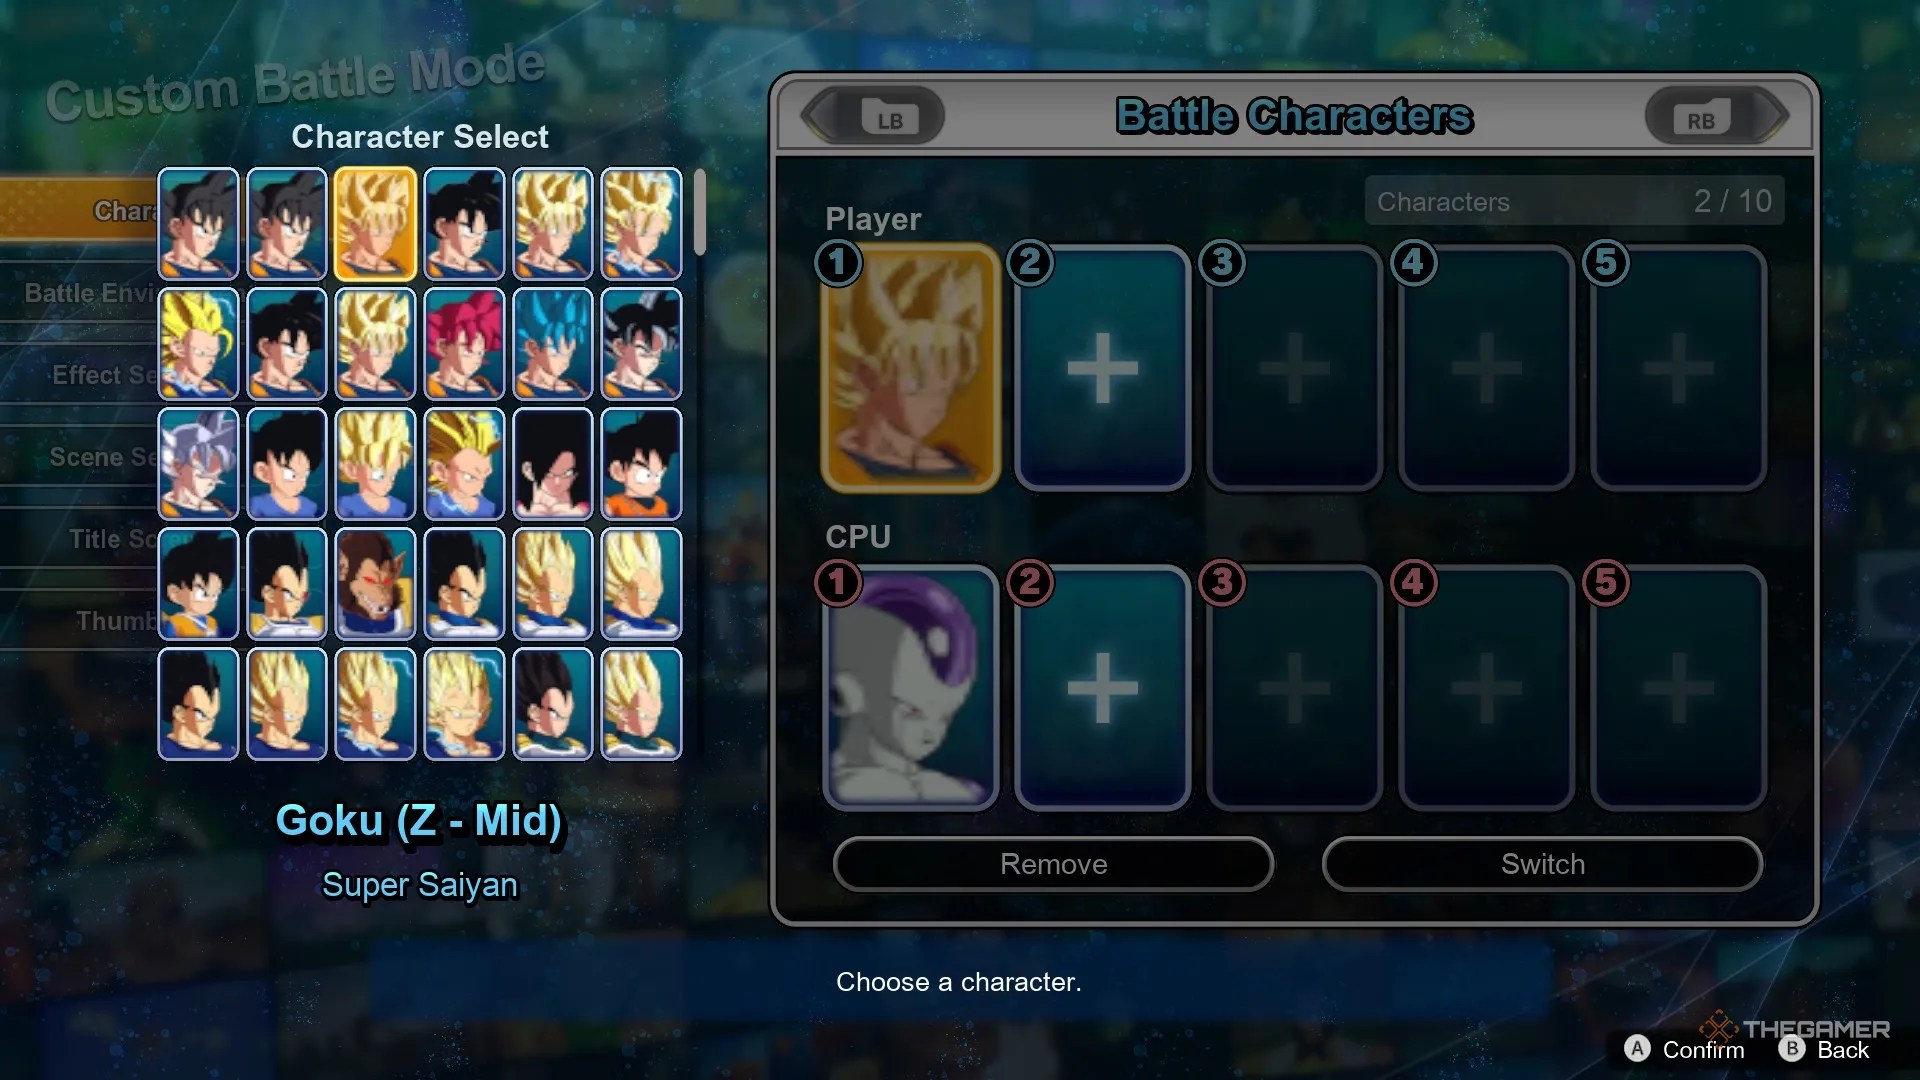
You canchoose who will be part of the fight from among the Battle Character roster.While you can quickly select the charactersfrom this side menu, you’re better offpressing the Character Details buttonshown at the bottom of the screen so thatyou can customize each participant further.
you’re able to customize everything the character can do here, fromwhat outfit they are wearingtowhich techniques they have available.

For this example, we’ve done the following:
Player’s Team
We putGoku and Vegeta on the player’s team, andgive Vegeta a lot of items, for a powerful fusion.
CPU Team
You canset the difficulty level and strategieson top of everything else. We’llpick Jiren and leave him on his default settingssince the buffs on Vegeta are more than enough to make the fight easy.
Once we’ve picked the fighters, we canalter the lineup settingsso characters arehidden from the player’s view.

For this we’ve:
You can alsoset guest charactershere who willonly appear in scenes.You can put any fighters you want, while also being able to pick other fan favorites, like Bulma, Dende and the Grand Minister.
For our example Custom battle, we’ll put Gogeta hereso we can use him in the futureas the fusion isn’t one of the characters in the lineup.

Battle Environment
In the Battle Environment settings, you can pick thestage, music, and overall rulesof the battle. We’ll pickthe Tournament of Power Arenaand set the music to the intro of the anime just for fun.
The important part is onthe Rule Settings tab, where we can toggle things liketransformations or team switching.

We will turnflying off for everyone, but if you want only a single character to be grounded,you have to equip them with a special itemduring character customization. Since this is the Tournament of Power Arena, we will also setthe Out-of-Bounds rules as well.
We will turnthe CPU transformation off, forcing Jiren to remain in his base form during the battle.We will still make him transform, but we’ll do that through an effect, meaning thatyou can set all sorts of things off here but still force them later on.

Effect Settings
This is where the magic happens, letting you triggerall sorts of things during the fight.
Among the things you can trigger here arecustom scenes, but we’ll cover them later; for now, we need to makeGoku and Vegeta fuseat the start of the battle. For this, we’ll first need toset a trigger condition. Since we want the characters to fuse at the start of the battle, we will setthe trigger as No Condition.
You can have things happen under all kinds of specific effects,such as health remaining or attack used.
Then we’ll pickwhat effect happens and to whom.If you let the player freely switch between characters, you canset the effect to happen on ‘allies’so it doesn’t matter who they pick, but forthis we’ll be choosingForce Fusion, Goku, andmake him fuse into Gogeta.
The fusions are only available because Vegeta is part of the team. If Vegeta isn’t on the team or is just part of the guest characters then fusing isn’t an option.
With the battle effect set, nowthe Saiyan duo will fusejust as the fight begins. Let’s set a similar effect, but this timeaffecting Jirenand with some added conditions; we willmake him transform when he’s low on health, and thenhe will recover some health back.
For this we do the following:
You cancopy or delete a trigger/effectfromthe sub menubutton, found at the bottom of the screen.
Scene Settings
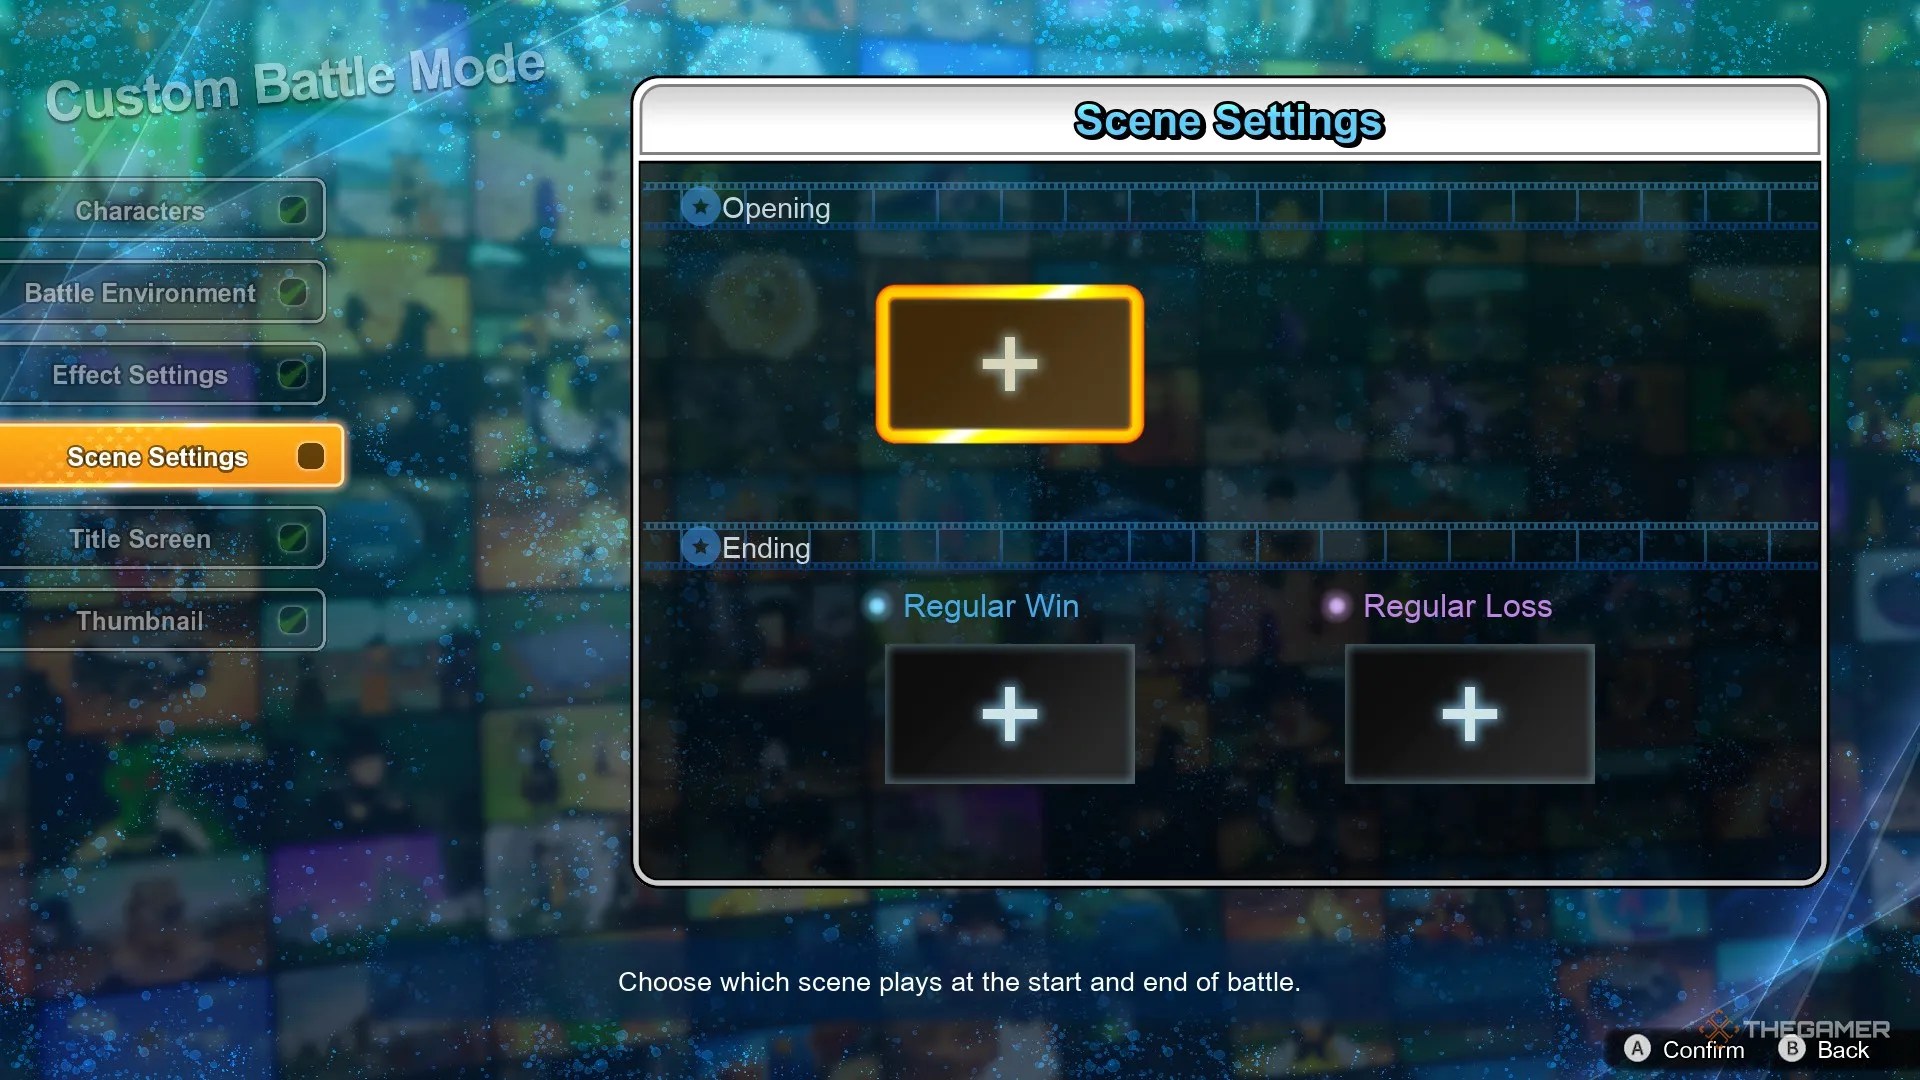
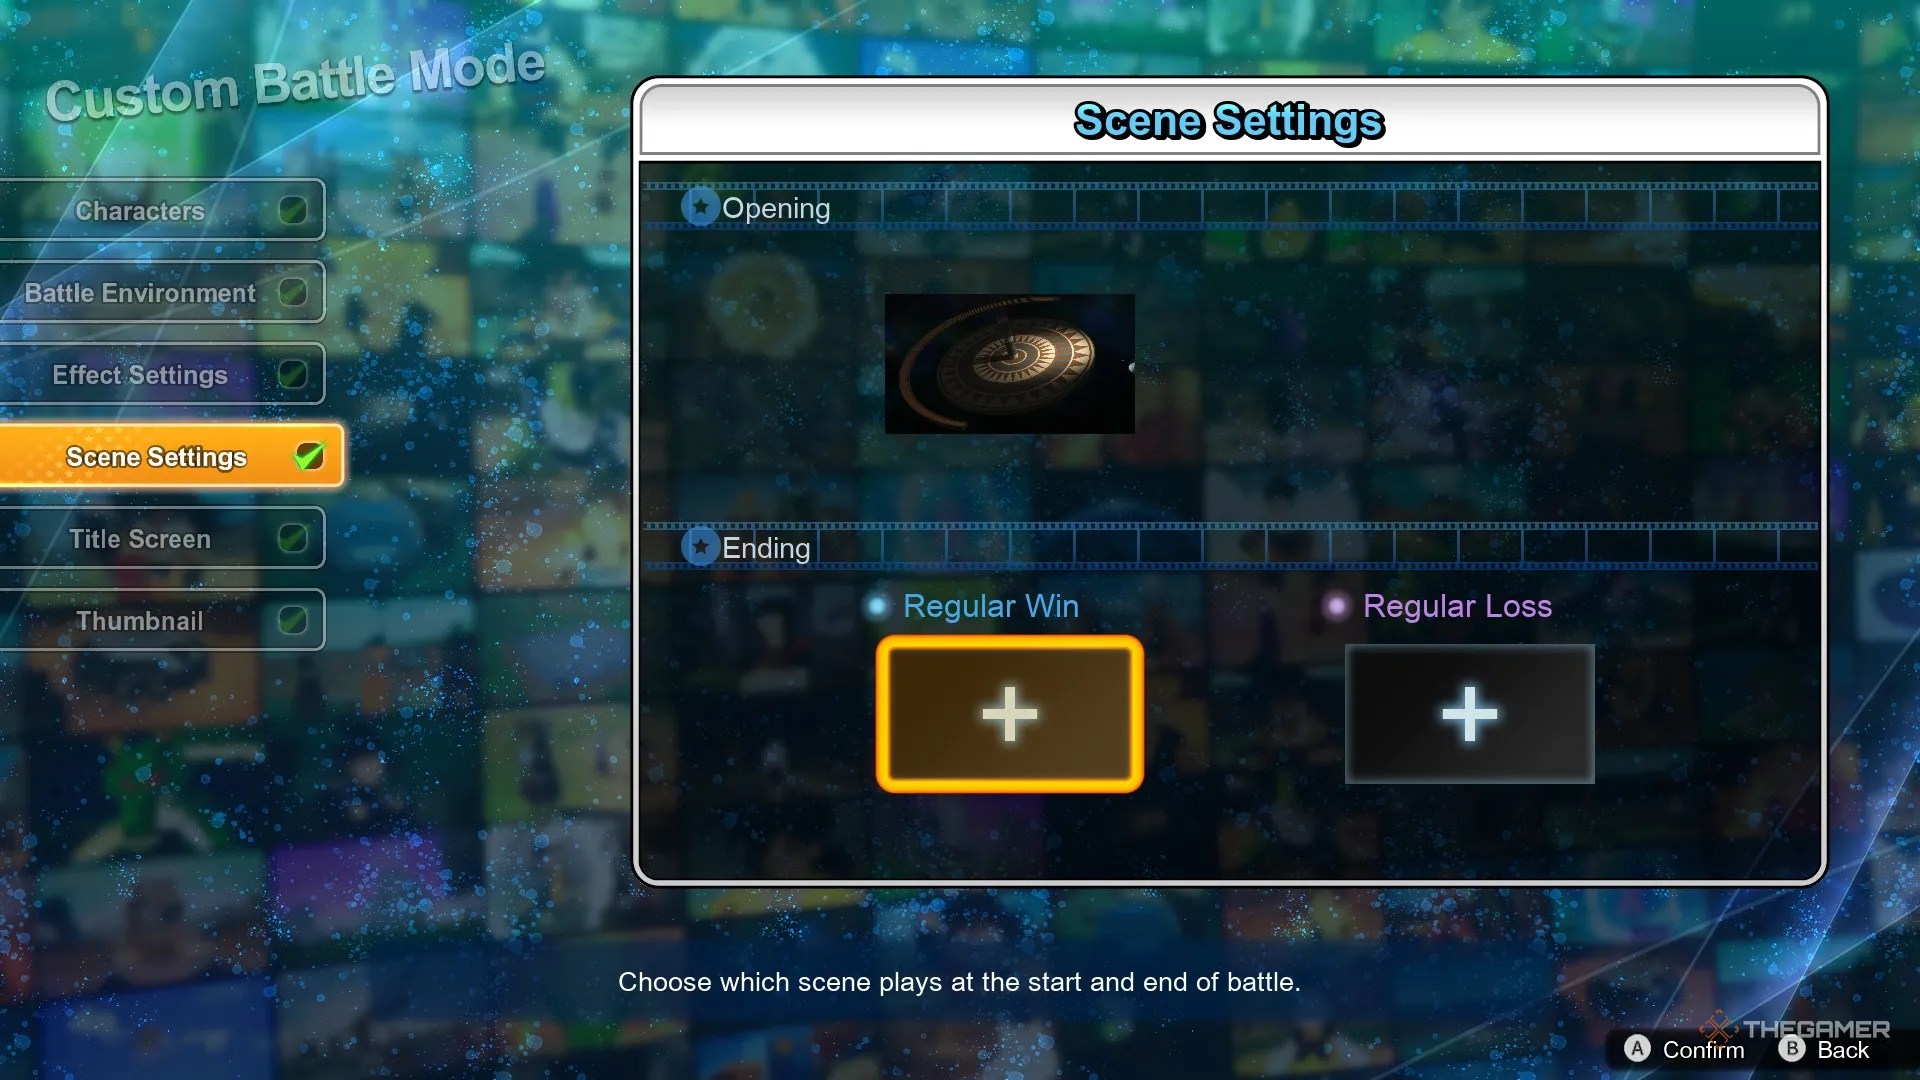
In this setting, you canmanage the scenesfor the start and end of the battle. You can alsoadd scenes in the middle of the fight, but you do so throughthe Effect Settings menu instead.Other than that,the way you create the scenes is the same.
You can even leave these all empty, having the fight start like a normal match.
Let’s create the opening, for whichwe’ll need to pick a scene, which are made ofone or more cutsthat you need to create individually.
For this example, let’s make one for now as we just want a short narration to set the scene. However, thedialogue is where you’ll struggle the mostin Custom Battle Mode.
You first have to firstpick between a 2D or 3D cut.2D cuts are far simpler to do, butthey are completely disconnectedfrom the choices you made for the scene and are comprised of common images from across Dragon Ball’s history.
You can unlock more 2D images by playing the story mode!
We’ll picka 2D still from the Tournament of Power Arenathat will take us to the menu tocustomize the scenario further. Every option is self-explanatory other than the caption, whichis how you will put dialogue into a scene, and all text is premade so the entries aren’t organized in a recognizable way.
You can set filtersso you don’t have to go through the over 5,000 lines of dialogue.
If you have a recurring character,you can easily waste time finding their namerepeatedly, so take note of how you found it to begin with.
The thumbnail isthe final and most important part of making a cut.You’ll be able to take a picture ofany moment from the sceneand use it as the thumbnail of your battle. This isn’t that relevant for 2D stills, but is something to keep in mind for more elaborate 3D moments.
With our intro done,we simply add the cut to the sceneand save it. We will now makea scene for a regular win, this time usingthe 3D elementsfor a more dynamic closing sequence. As you may notice, the characters and stage that show up arethe ones we picked.
We’ll make a simple cutwhere Jiren flies away in pain, but add another cut whereGogeta looks at the camera.
This is whywe added Gogeta as a guest character, otherwise,we wouldn’t be able to make a scene involving himeven though the player will win as Gogeta.
When making a 3D scene,you can alter the faces and poses of the charactersto your heart’s content, all withinthe parameters of the specific scenarioyou chose. We won’t go into every single option, butnearly every combat interactionyou can think of is available here.
For the ending,we are making a scene made of two cuts, but you can see thatthe 2D scene can also be picked.This lets you make various scenes with slight variations, without having toremake the cuts that don’t change.
If you’re making several connected battles,you’re able to add a next episode previewtext after making the Regular Win scene.
We won’t be using the next episode preview here, so let’s move onto the finishing touches.
How To Finish The Custom Battle
You’llneed a title screenmade ofa thumbnail image and text.The text works in much the same way as before,having to go through the filters, but the thumbnail depends onthe cuts you created;however, you don’t need to use said cuts for them to be part of your thumbnail.
Once you have your thumbnail and title chosen,you can set the tags.They should bedescriptive of what is going onin the fight so players can easily find it. We’ll go withEasy and Tournament of Poweras that describes our creation best.
The slide isanother great way to showcase your battle, but since we are keeping Gogeta and Jiren as surprises of the fight,we will only pick the 2D thumbnail for the slide.
Once everything is done,you must play and beat your battlebefore you can upload it.
You’ll know the fight is ready to be uploaded thanks tothe little joystick icon with a check markthat appears next to it.
You canuse the sub menu to edit or delete the fight.
Once you’re happy with it, you just need topost the battle from the sub menu, and that’s it. You can find your battle inthe World Library under My Page, where you’ll seeits ID below your username.
If you want to see how our example battle turned out in-game,the ID is 2-632-619-740.